

If you enjoy the beauty and tranquility of winter snow you should really consider setting up camp. It’s a different experience that everyone should try at least once. You’ll get to experience nature in isolation without all of the big crowds scaring off the wildlife. You don’t have to be afraid of the cold with a little bit of preparation winter camping can be downright comfortable. Just follow these winter camping tips to stay warm and safe this winter camping season.
Winter Camping Tips to Prepare For the Cold Weather
Don’t Leave Home Without This Extra Gear
When camping during the summer it might not be a big deal if you forget a few items. During the winter trekking through snow a mistake could be disastrous.
 Map and Compass: You really need to bring a traditional Compass like this UST Deluxe Map Compass(on Amazon) and topographical map on any long trip. Unless you plan on camping close to your car you are going to want to bring a way to navigate. This is one area where I like to add a little bit of redundancy. On any long trip you really need to bring a laminated topographic map of the area. Even if you have a gps receiver throwing in a map and compass won’t add much weight to your pack. You never know when your gps is going to break and leave you stranded in the wilderness. Also throw in a Altimeter if you are hiking through hilly uneven terrain.
- Sunglasses: Whether you want to bring sunglasses or goggles you need some way to protect your eyes against the sun. The sun bouncing off the snow is a killer on long winter hikes.
- Emergency Shelter and First Aid Supplies: Even if you are only planning on a quick day hike always bring a small emergency shelter just in case. You never know when the snow is going to pick up or you’re going to get an injury immobilizing you. With an emergency shelter and a few first aid supplies you can stay protected from the elements until help arrives.
- Bring Along Extra Food and Water: You don’t have to bring a ton of extra food and water, but a little bit extra goes a long way. An extra energy bar or snack every once in a while really goes a long way on extended camping trips. Remember getting water in the winter isn’t as easy as it seems. Even if you bring along a stove to melt snow you’ll still have to find a way to sanitize it.
- Extra Gloves, Socks and Clothing: It doesn’t matter how careful you are planning somebody on your trip is going to get wet. A few extra pairs of gloves and socks thrown into the pack is almost a necessity on a long trip. I like to pack a few extra shirts and pairs of pants just in case as well.
- Tools and Basic Repair Kit: Bring a couple tools that you might need to repair your gear. Bring everything from a tent patch kit to a small sewing kit just in case you tear a hole in your gear. At the very least throw in a roll of duct tape just in case. Duct tape has pulled me out of a few unfortunate situations where my gear let me down.
- Fire and Lights: I like to bring a couple basic ways to make a fire and some type of backup lighting just in case. Even if the box says your led lantern batteries will last two weeks bring additional lighting. With shorter days you will rely on lanterns for a long part of your trip.
My Favorite Winter Camping Tips
Winter camping trips offer a lot of challenges that you don’t normally encounter during the regular season. You have to be prepared for the weather to change in an instant. With less daylight to prepare you need to be sure you have extra equipment and some additional skills. Before you leave home you need to have a plan on everything from heating your tent to stopping water from freezing.
- The most important aspect of winter camping is that you should never go out into the wilderness alone. One small broken ankle can turn into a disaster if you don’t have help. So you might as well find a few friends that want to brave the cold with you. They might even have a few winter survival skills that might come in handy along the way.
- Talk to people in the surrounding area who have camped in the region. It might be a good idea to give the local park services a call and ask for some recommendations. Local hunters are also a great source of knowledge when it comes to traveling the woods in winter.
- Once you have a good idea of where you want to go buy a map and research the area. I know you have a smartphone with google maps, but it’s well worth buying a laminated physical map just in case. The last thing you want to do is get lost in the woods when it’s freezing outside. Figure out how long it will take to get to your location and set up camp. Figure out what emergency services will be able to access your location.
- Check the local trail conditions and make sure you aren’t somewhere known for avalanches and other winter dangers. Before you go it’s always a good idea to learn to recognize avalanche danger signs. Avalanche forecasts aren’t very accurate for specific rural areas. If you plan on camping in a sloped area you need to get formal avalanche training before your trip. A cheap 2-3 day online or in person course could end up saving your life.
- Leave a trip plan with someone that is not coming along with you on the trip. Make sure that everybody in your group is on the same page and leaves the same plans with their loved ones. Rescue agencies have strict rules on rescue operations and you don’t want to unnecessarily delay a rescue. Make sure you leave information about your vehicle and where you plan to park. It wouldn’t be a bad idea to leave a few pictures of your car and license number just in case. Include names and contact numbers of the other participants in your group.
- Build a Winter Camping Checklist a few months in advance so you don’t forget anything important. It’s always a good idea to bring a little extra cash for unexpected fees or car trouble. If you forget something there’s normally a Walmart a short drive away.
- Be Prepared for the unexpected with extra food and clothing in case the weather changes. You never know what’s going to force you to make an unexpected deviation to your plans.
Choosing The Right Cold Weather Clothing
When you’re camping in winter you need to stay warm and dry. You need to find clothing that will both insulate and allow your body to breathe. Try and find layers that wick moisture and dry quickly. By adjusting your layers you can regulate your body temperature without adding a lot of weight. The three basic layers of clothing you need to wear are base layer, Insulating layer and shell(outer layer).
- Base Layer: Your base layer of clothing is going to consist of all the clothing that are directly next to your skin. I like to stick to synthetic materials that wick away sweat but others prefer merino wool. Depending on the temperature you might want to wear two base layers. A good option would be a lightweight synthetic layer with a heavier wool based layer on top. The synthetic layer will wick moisture away from your skin so it can quickly evaporate.
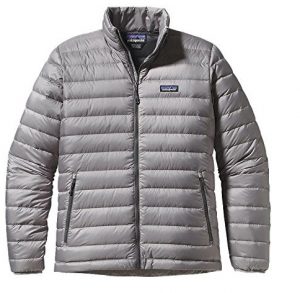 Insulating Layer: Your middle layer is going to be all about insulating your body to retain body heat. You should consider a heavy fleece shirt jacket or any midweight goose down jacket. There are a ton of down jackets on the market made by Patagonia, Columbia, and Outdoor Research. By far my favorite down jacket on the market is this Patagonia Jacket. It really is amazing how warm a lightweight patagonia jacket actually is. The only downside to Patagonia clothing is the price tag. If you can’t afford the Patagonia coat any down jacket meant for snowboarding or skiiing will also work well on a camping trip.
- Shell: Your Winter shell is also known as your outer layer or jacket. Your outer jacket should be waterproof and windproof yet breathable. This is a hard combination to find, but most moderately priced Gore-Tex jackets should fit the bill. If you don’t want to spend as much consider a polyurethane jacket that won’t be as breathable. You can normally find affordable waterproof jackets in construction, emergency and military attire.
Throughout your camping trip you’re going to constantly need to shuffle base layers to keep your body comfortable. While working you might need to shed a few layers to avoid sweating. After your done working quickly add on a few more layers. The colder your body gets the harder it is to warm it back up again. Once you’re cold it’s extremely hard to get comfortable again.
Choose The Right Winter Boots
If you’re going on a short camping trip you might be able to get by with a decent pair of hiking boots or work boots. When you plan on spending a few days out in the weather you should seriously consider buying a pair of mountaineering boots. They will keep your feet a lot warmer and give you a lot more traction on icy surfaces. Don’t even consider snowboarding or skiing boots, because they don’t provide enough traction.
Most people make the mistake of buying winter boots that are much to tight. Remember that you are going to have to wear a pair of thick socks with the boot so give yourself a little extra room. When boots are too tight they restrict blood flow making your feet much colder. Think of how older people with circulation issues get much colder compared to teenagers. Find a pair of boots that have a little extra room yet are still comfortable to walk in.
What’s The Best Winter Camping Gear
When you camp during the winter you need all of your regular summer camping gear plus extras. Looking at gear in it’s basic level you are going to need shelter, means of transporting gear, Sleeping Bags and Pads, Lighting and Batteries, Basic Ground Cover, navigation and radios, emergency and cooking gear. I’ll delve further into shelters below.
Hiking Backpacks
 Camping during the winter requires a lot of gear so you are going to need a high capacity hiking backpack. You’re going to need to pack as lightly as you can without forgetting anything. You need to make sure you’re always prepared for rough winter conditions. You never know if you are going to have to hunker down and wait out a rough winter storm.
Unless you’re planning a lightweight trip or pulling a sled purchase a 80L pack at minimum. Lash points are also a must if you plan on carrying skis, snowshoes or trekking poles. There are a ton of great oversized packs on the market, but I’ve been leaning towards this High Sierra Long Trail 90L Pack on Amazon. It’s completely waterproof, comfortable and comes in at a reasonable price tag. Probably wouldn’t be my first choice, if I could afford the more expensive Kelty Coyote 80 Backpack I’d pick one up in a heartbeat. Unfortunately I’m not able to call off work and go on camping trips as much as I’d like to justify that Kelty pack.
Pulks and Gear Sleds
If you are planning a long expedition or trip you should seriously consider bringing a sled. A sled will help you reduce the weight on your back and allow you to carry more gear. If you are trekking through steep hills and trails you might not be able to get a sled in. Map your route beforehand and figure out if a sled is practical. Before your trip you might want to practice pulling some weight wearing your snowshoes. You’ll most likely have to adjust the amount of gear you want to bring.
Get off the Ground With Sleeping Bags, Pads and Ground Cloths
When camping during the winter you are going to want to find a heavy duty sleeping bag. I like to purchase a sleeping bag that is rated approximately 20 degrees colder than you expect to experience. If you get to warm you can always vent the bag a little bit. If you buy an expensive sleeping bag you should consider adding a Sleeping Bag Liner. You don’t have to spend a lot of cash on a liner if you get the right bag. Unless you’re going up into the mountains on negative 20 degree days, the Coleman’s Stratus Liner is all you’re really going to need. It will not only increase the warmth of your bag it should increase the lifespan of your bag.
You’re going to want to find a down sleeping bag to keep you warm during the winter. If you have allergies to down synthetic is another option, but down is far superior. Goose down will keep you warmer without adding a lot of heft to your pack. Just make sure that you either buy a waterproof down bag or keep your bag completely dry. Down loses its insulating capabilities when it gets matted down by moisture. IF you are shopping in the used market you can tell a winter bag by the draft tubes behind the zippers and shoulders. Draft tubes help keep heat in the bag.
Sleeping Pads
Buy two sleeping pads for camping in the serious cold. The more space you get between you and the cold ground the better. I like to combine a Foam pad and self inflating pad. You’ll not only be farther up off the ground, you’ll still have a foam pad if the inflatable one gets punctured. When you are shopping around for pads buy one with a higher R-Value. R-Value is the amount of insulation the pad has measured from 1.0-8.0. The higher the R value the more protection you have from the cold ground.
Ground Cloths
Ground cloths will protect your tent from melting snow water. Any tarp will work if you don’t want to buy a dedicated tent footprint. The only real advantage tent footprints have is that they’re a little lighter and cut specifically for your tent.
Lighting and Two Way Radios
Winter nights are long, especially when you start to get farther up north. Make sure you pack a sturdy headlamp and some extra batteries. Make sure that you buy brand new batteries before the trip. Try and stick to lithium batteries if they work well in your headlamp. Cold temperatures decrease battery life so bring more batteries than you think.
You probably won’t have cell phone coverage out in the forest so you should purchase decent two way radios. You’ll be able to communicate with members of your group when they go off. They have a limited coverage area so keep that in mind when separating. Satellite phones are another great option if you want to be able to communicate back home.
Other Gear
 Crampons: Crampons are an optional piece of gear that provides traction in the ice. These are almost a necessity when traveling through technical terrain. There are a ton of different crampons on the market, from the extremely cheap to the really expensive. You’re the only one that knows exactly what kind of gear you’re going to need.
Poles: Hiking through the snow is hard so you are going to want to bring a pair of heavy duty poles. They will provide support on slippery terrain and help you sludge through ice and snow.
Ice Axe: Make sure you know how to use an ice axe before heading out. An ice axe can help you when sliding or serve as an anchor when climbing through rough terrain. You might also need to cut through ice when setting up your camp.
Making Camp in The Cold
You need to make sure you reach your camping location with a few hours of daylight to spare. Once you’ve reached your destination try and find a spot with natural barriers to protect you. First you are going to need to find a natural water source. If you can’t find a water source you’ll most likely need a way to melt snow. Make sure your site isn’t in a avalanche zone and has natural wind protection. If you can’t find wind protection a few guys can build a snow wall to block the wind. Try and stay away from potentially dangerous trees and notice a few landmarks in case you get lost. If you choose a sunny spot the tent will warm up faster in the morning.
Types of Winter Camping Shelters
Unless you are a seriously experienced outdoorsman I would recommend sticking to a tent or Bivy Sack. You can also build a snow cave igloo or trench, but that’s much to advanced for most parties.
Mountaineering Tents
Most experienced campers are going to want to bring a mountaineering tent. Mountaineering 4-season tents are really easy to setup in frigid conditions. These tents offer much better wind and snow protection compared to 3 season tents. When looking for a tent make sure you purchase one with a dome shape and dual doors. Dual door setups protect you from the harsh winds and moisture. It should also have a long vestibule(entry way) for storing all of your wet gear.
Single Wall vs Double Wall Tent
You are going to have to choose between a single and double wall mountaineering tent. Both of them have their own advantages and disadvantages. A single wall tent is typically much lighter and far easier to setup. They typically have a little bit less insulation and cost more. Some people claim single wall tents allow more condensation, but I’ve never experienced that. A Double wall tents main advantage is that they are warmer and cheaper. However they do take a lot longer to setup.
Bivy Sack
 Honestly I’ve only used a bivy sack once and it was a nightmare. I brought along my Outdoor Research Helium Bivy when I went up into the mountains near Seattle. Everything went really well with the bivy, but unfortunately I have a little bit of claustrophobia and the relentless pounding of snow made me feel like I was being buried alive.
Even though next I’ll probably bring my tent the next time I go into the mountains climbers really love bivy sacks. They can’t bring a lot of gear with them so bivy’s are the perfect alternative to a traditional tent. It basically works like a waterproof overbag on top of your sleeping bag. It will keep your body about 10 degrees warmer than the sleeping bag. There’s no room to stow your gear inside a bivy sack so bring a cover for all your gear.
Finding Your Route
Snow makes finding your way difficult even in familiar terrain. Before you head out make sure that everybody has a good map and description of your route. You should always keep a map, compass and altimeter(if mountaineering) on hand. It doesn’t matter if you have an expensive GPS you need to know how to use a compass and map.
Before you go on your trip study your map and plot way points in advance. Plan and follow a safe route and avoid just wandering in someones tracks. Try and avoid Rivers Lakes Rivers, bridges ravines and avalanche zones. Try and stick to your planned bearings unless you come across unsafe conditions. IF you get lost stay calm and evaluate the situation calmly. If you don’t have a GPS check your map and compass looking for landmarks. A topographical map will make finding landmarks much easier. If you’re in a group always stay together and make yourself easier for rescuers to find.
Cooking During the Winter Camping Season
It seems like one of the most difficult things for people to wrap their heads around is cooking during the winter. While there are a few slight differences for the most part it’s just like cooking in the sun. The biggest difference is that you are going to need a liquid fuel camping stove. As the temperature drops the pressure in canister fuel canisters drop as well.
You might be able to cook for a little while on a canister stove, but the performance will significantly drop as fuel decreases. With a liquid fuel stove you can change the pressure by pumping up the canister a bit. Before you go out into the wilderness make sure that your stove is working properly and fuel lines aren’t plugged up. You should also consider bringing a backup stove and a lightweight backpacking cookware set(these are a few of my favorites) which at the very least will speed up the cooking process in large groups.
It’s important to find a sheltered cooking spot whether that’s in your tents vestibule or behind a small pile of snow. You can also buy a windscreen or build a small trench to cook in. Just remember that at higher elevations you’re going to burn through a lot more fuel. You’ll also need to melt through drinking water if there’s no other natural source of freshwater.